A Guide to Tarping a Roof?
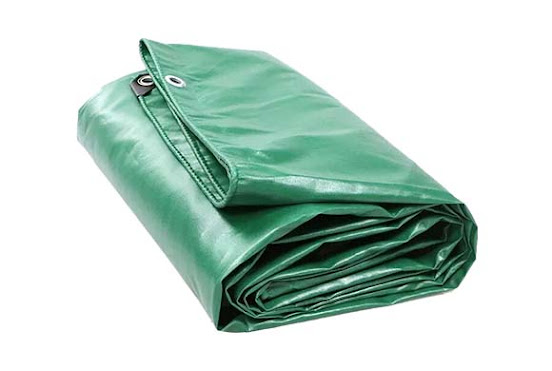
If installed correctly, PVC Tarpaulins can keep bad weather out of your house for up to 90 days. A roof can be tarped to temporarily stop leaks and protect it from water damage.
You will learn how to tarp a roof in a straightforward and cost-effective manner in this guide. This will keep you dry until you are able to fix it yourself or hire a professional to do so.
Examine the Damage
After evaluating the damage, you should remove any debris from the area. Take into consideration the following tips:
- It is best not to use tarps to cover a roof during a storm or when there is a lot of wind.
- Make sure you’re wearing the right safety gear, like sturdy boots, gloves, goggles, and protective clothing.
- To inspect the roof, ladder access is required. Look for broken shingles and other damage on the roof.
- Never directly step on a steep or slippery homeowner’s roof. Instead, they should look at the damage from a ladder.
- Using a broom, clean the debris from your roof carefully. Remove any branches, leaves, or other debris to improve your view.
- Examine, clean, and tar your roof for support and safety with the help of a friend.
Measure the Area
Tarps should be bought in proportion to the size of the damaged area.
- Measure the surface area of the damage with a measuring device.
- Ensure that you measure your area and select the appropriate tarp size based on the results.
- In addition to covering the damaged area, the tarp must extend four feet above the roof’s peak when unrolled.
- You can securely hang additional tarps from the edge of your roof.
Preparation and Installation of the Tarp
It Is Critical to Ensure Proper Roof Positioning It should be secured and weighed down in windy and stormy conditions to keep it from blowing away.
- A tarp can be held in place and prevented from blowing away with the help of sandbags as temporary anchors.
- Roll a two-by-four-inch board into the tarp’s peak end. Nail the board to the tarp for a fix that is stronger and more secure. It should be two feet longer than the width of the tarp. In order to prevent the accumulation of snow, rainwater, and other debris, the board ought to be positioned against the roof. When installing the board as a temporary anchor on the roof, use nails that are long enough to penetrate the tarp, board, shingles, and decking.
- To ensure that the tarp remains taut and fully protected, nail a second 2 x 4-inch board over the first.
- The final peak ends of the PVC Waterproof Tarpaulin should be covered in the same way as the first two steps.
- Two people are required to position, prepare, and secure the tarp. Additionally, only work on this project in pleasant weather. You should never stand or step on your tarp because it might be slick.
Secure the Tarp
Securing the PVC Tarpaulins UK prevents flapping, water seepage, and debris from entering the damaged area.
- To secure the tarp, use the screw gun to screw through the four rolled tarp boards. Verify that the screws are long enough to pass through the tarp, board, and shingles as well as the roof decking. Once the tarp is removed, you will need to replace the shingles if your roof leaks, which can result in extensive water damage. However, shingles replacement is less expensive.
- Additional 2-by-4-inch boards can be used to secure the tarp’s remaining sides. Please be aware that these boards need not be rolled into the tarp.
Conclusion
Always prepared and prepared with the necessary materials for water damage restoration. Roof tarping is a temporary means of preventing damage to your property. You should always hire a professional to fix your roof.
To Read More Articles:

Comments
Post a Comment